Setup Kannada Typing Software in Windows 11
After download and installation of Kannada Typing software, we need to setup Kannada Indic Input 3 in Windows 11, to be able to use various keyboard for Kannada typing. Setup process for Kannada Keyboard in Windows 11 is different from it's previous version Windows 10, 8, 7 or XP.
Typically it's takes 1-2 minutes in complete process and your system will become able to type with Kannada Keyboard. Here are we given step by step process of Setting up Kannada Indic Input 3 with screenshots.
Configure Kannada Indic Software and Keyboards in Windows 11
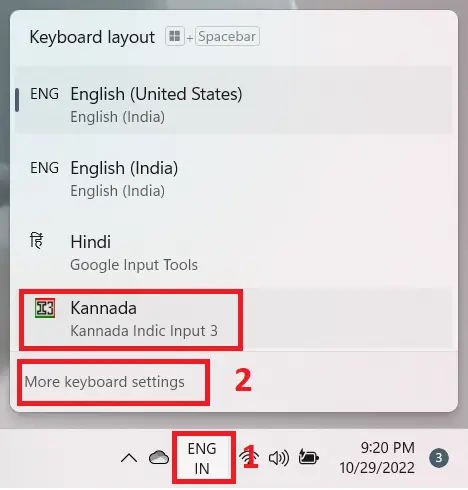
Step 1: After download and successful installation of Kannada Indic Input 3 you will see the software appear in language bar, Click on "More Keyboard Settings" option as shown in below image:
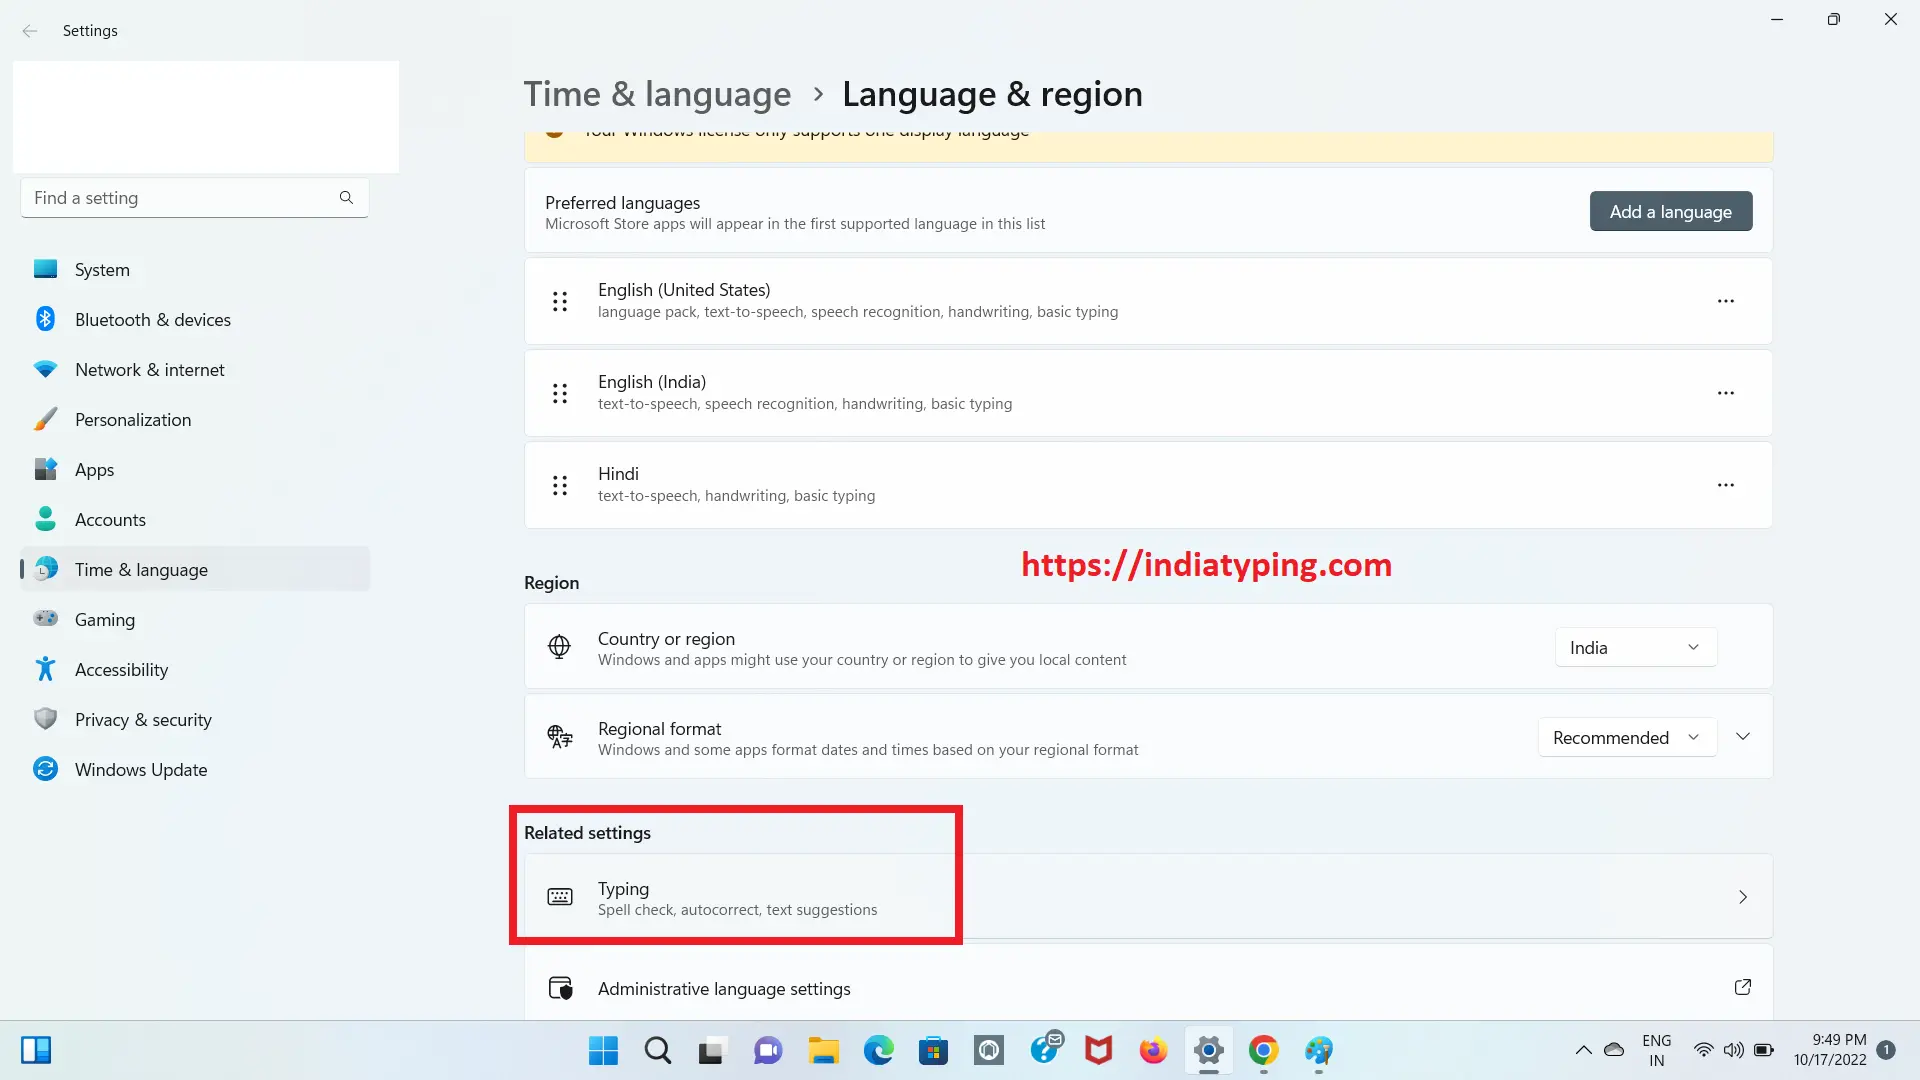
Step 2: Click on Keyboard as shown in image given below:
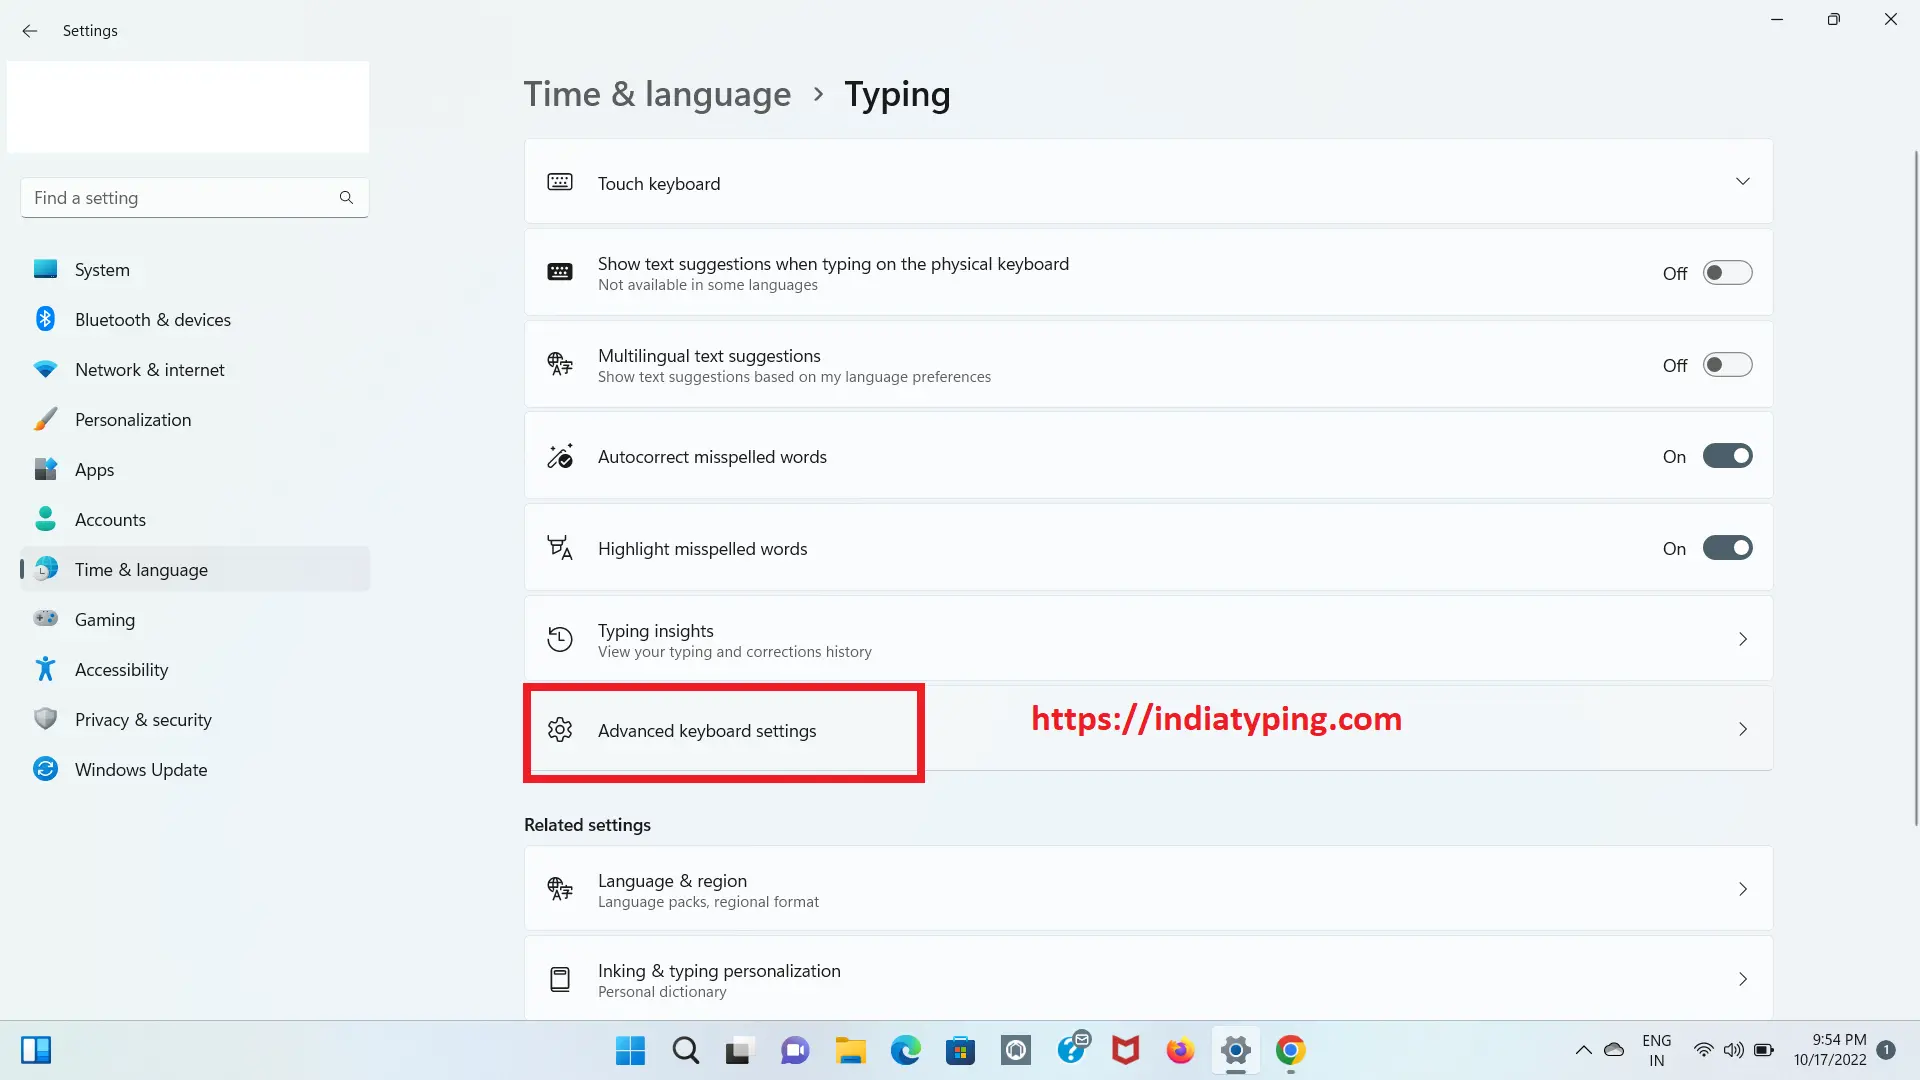
Step 3: Now Click on "Advanced Keyboard Settings" as shown in below image:
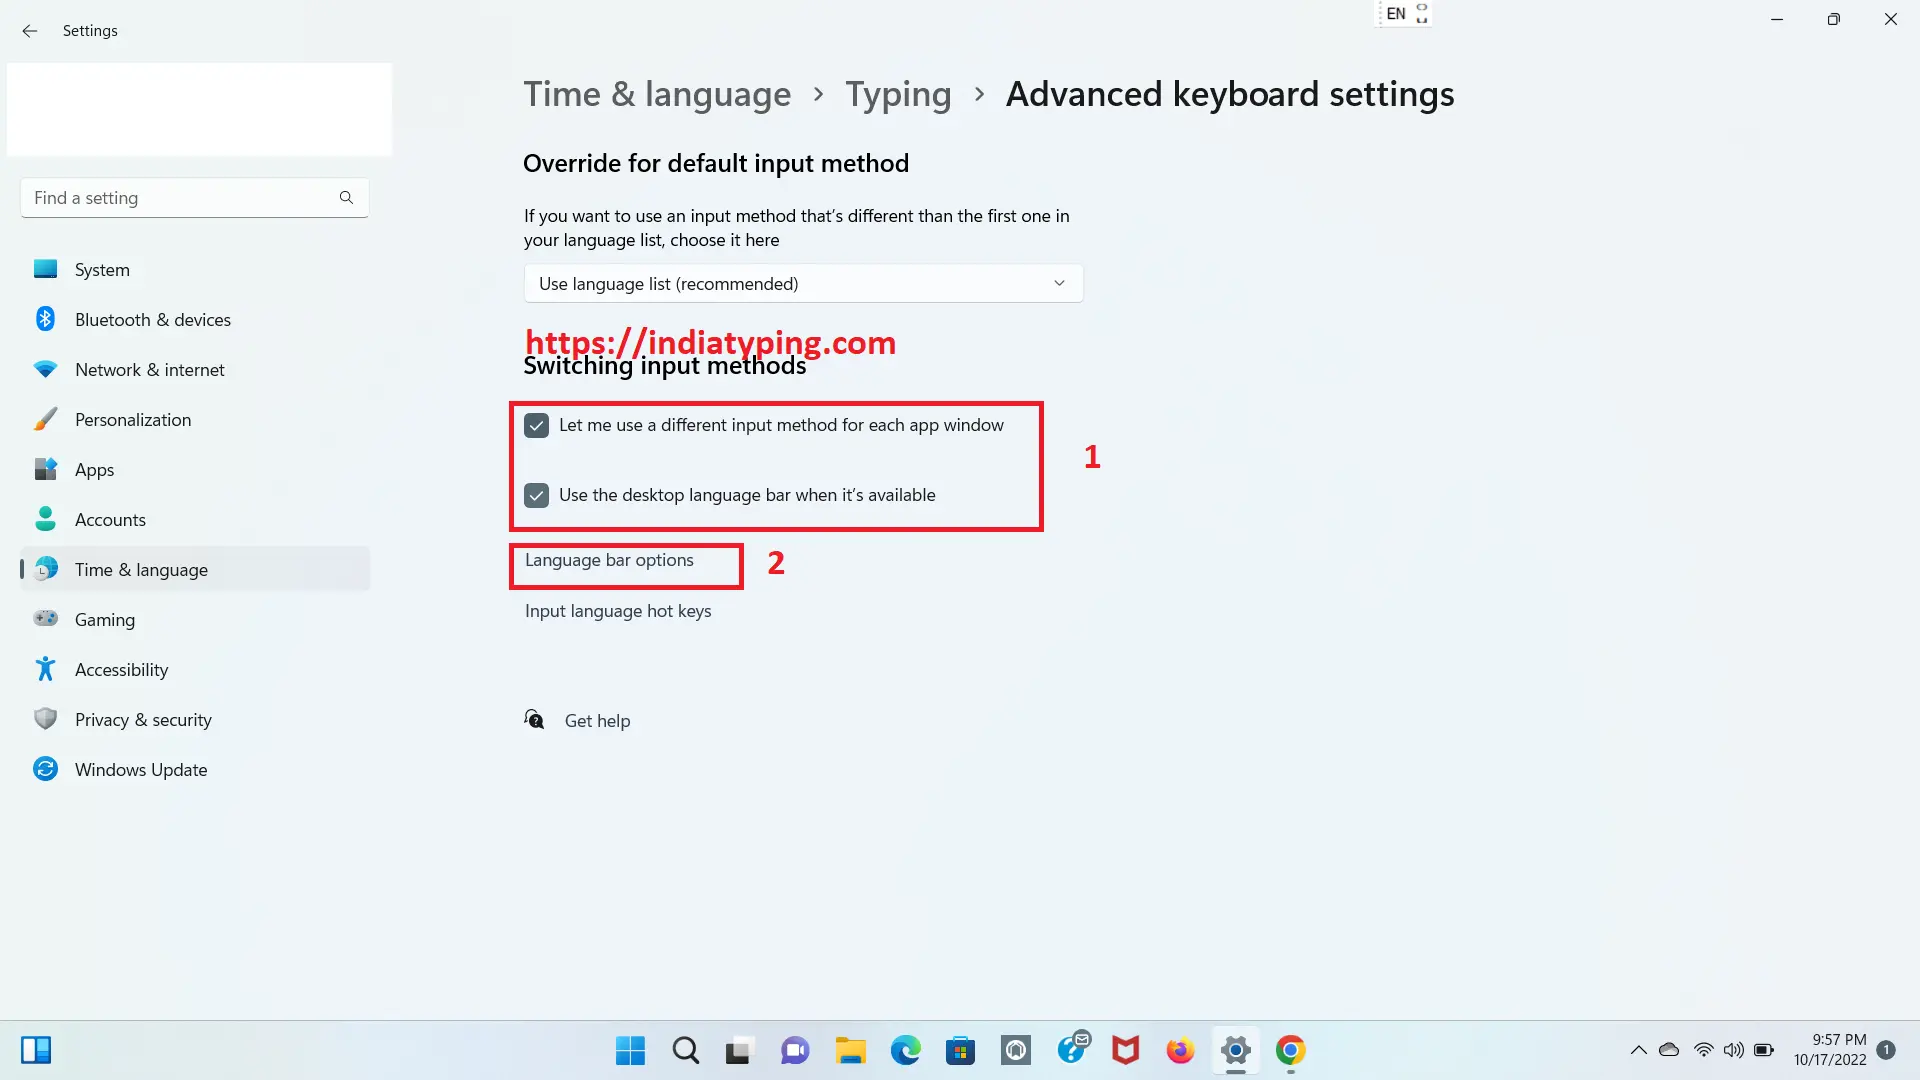
Step 4: Now you will see two check box, under the title "Switching input methods" check them as shown in image below:
Step 5: Now you will see a new window titled as "Text Services and Input Languages" will open, check all three check boxs and select "Floting on Desktop" option and click on "Apply" and "Ok" button respectvely as shown in below image:
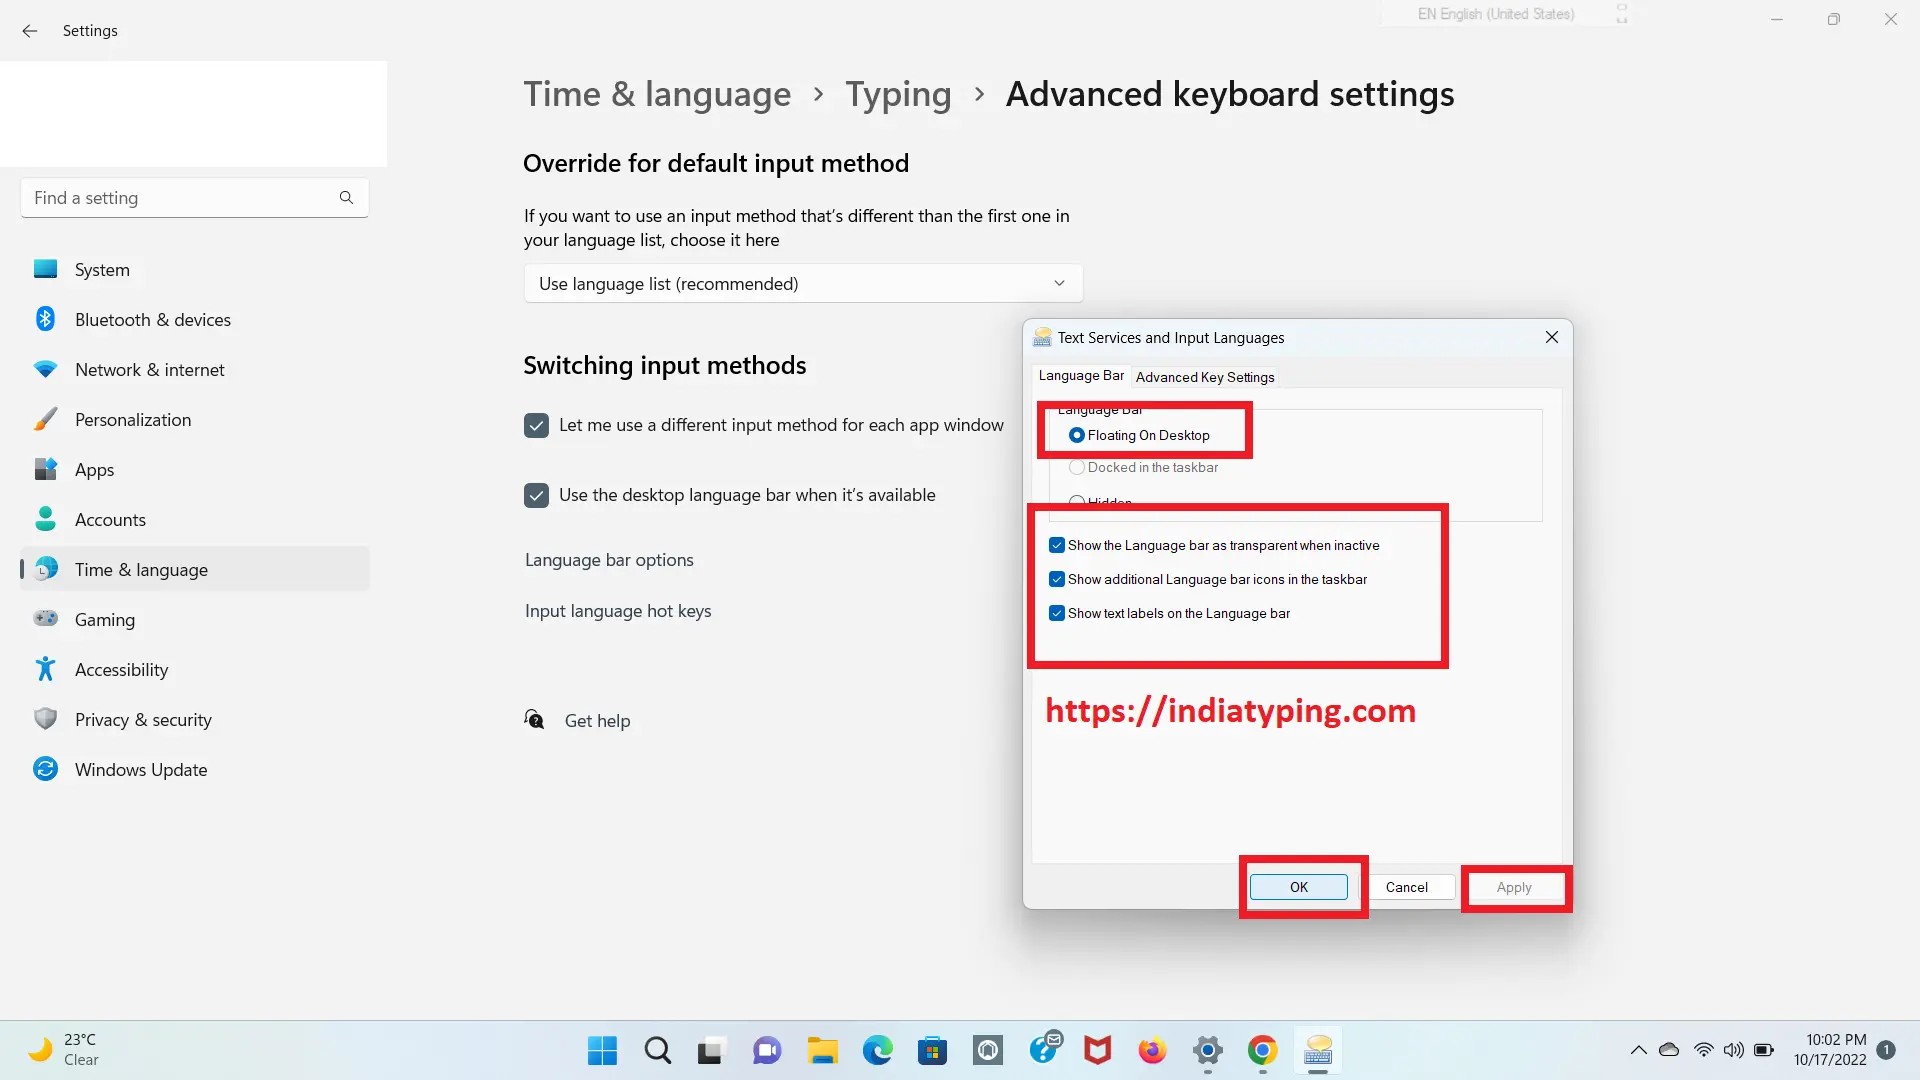
Step 6: Now you will see a languae bar is appear in top right corner of your computer screen Click on that and change the language to Kannada Indic Input 3 -> Click on "Down arrow button" -> "Keyboard" -> select KGP Keyboard as shown in image given below:

Step 7: Congratulations !!! You have done. Now Open MS Word and you can type in Kannada keyboard. There may be possiblity it will not work in Notepad.
<< Previous Step to Download Free Kannada typing software
